
Visual installation walkthrough
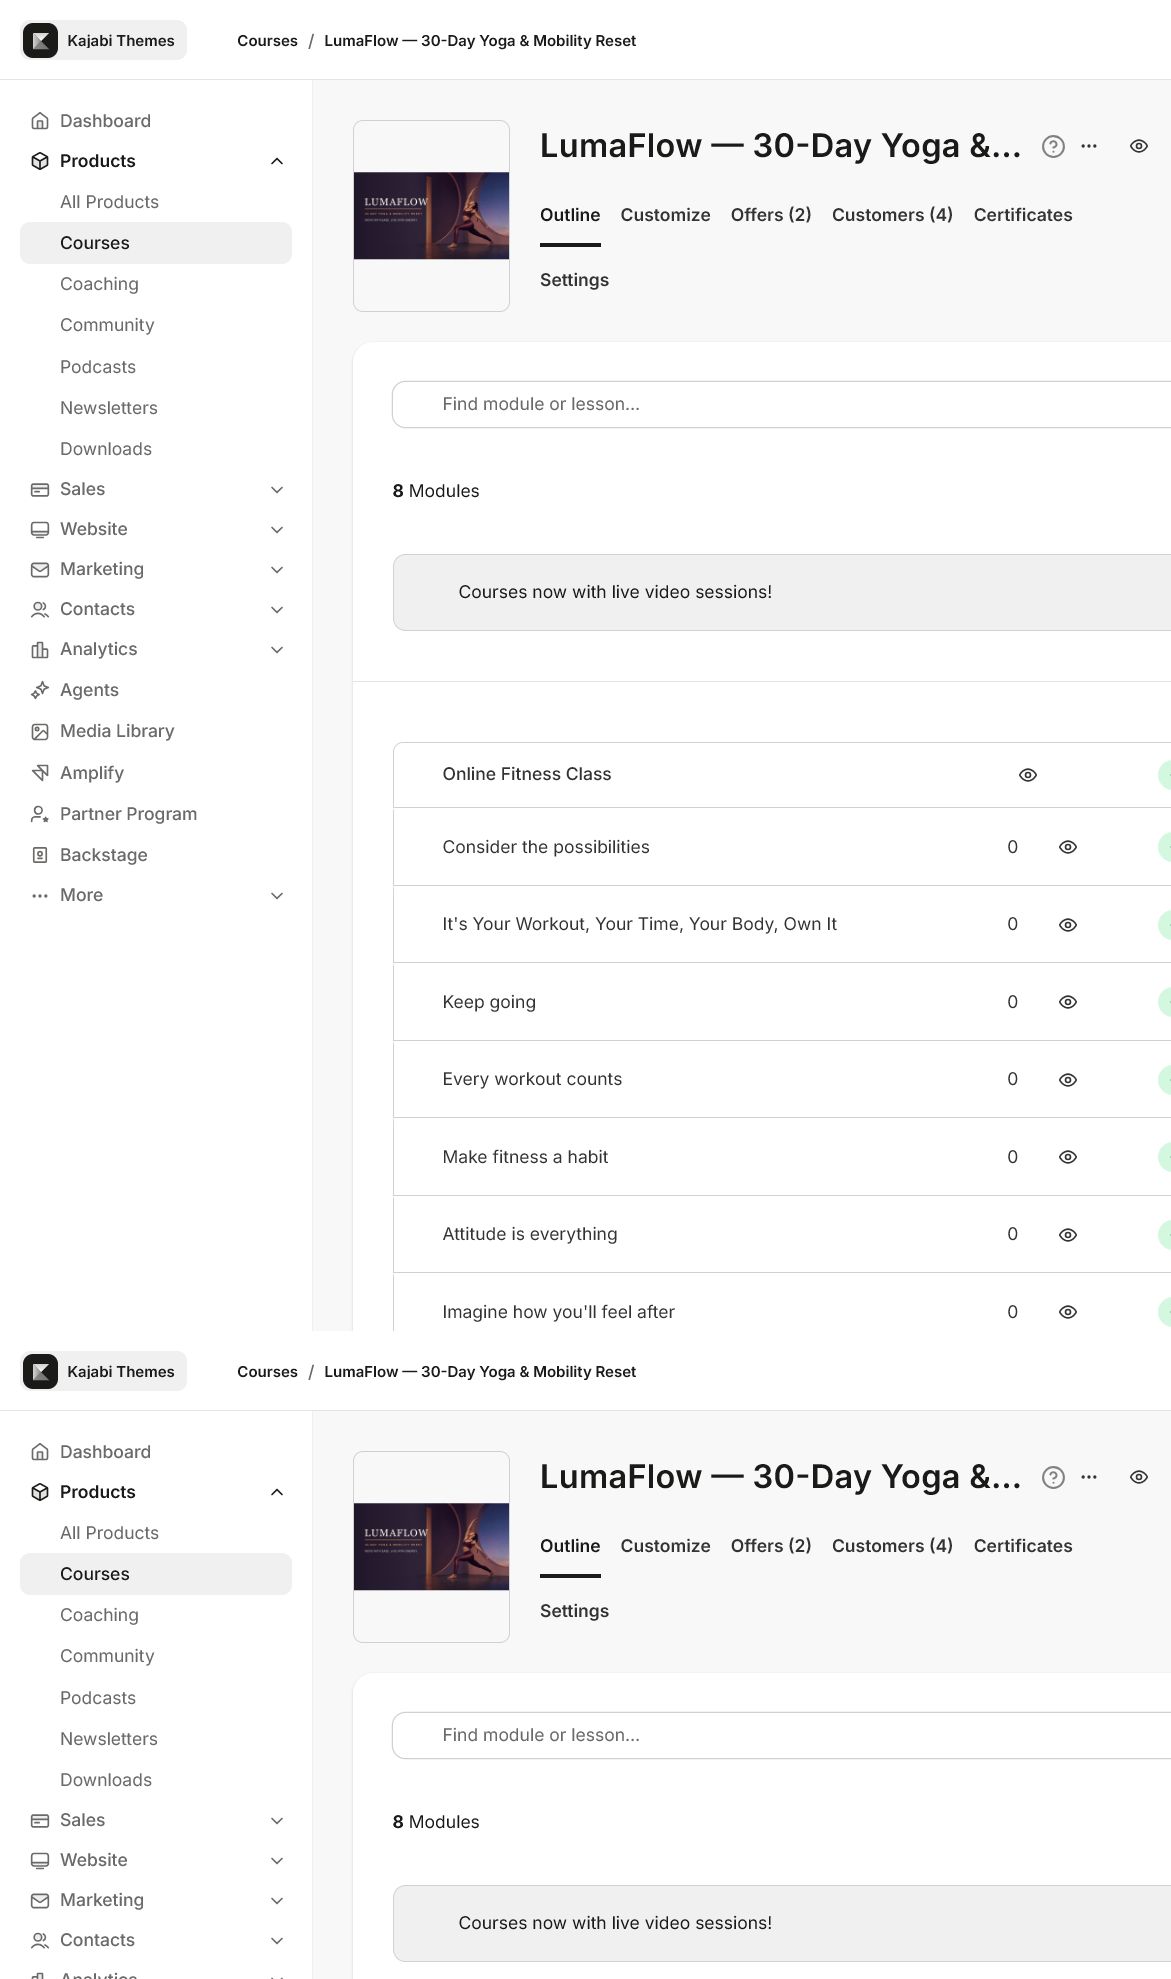
### 1. Confirm the Course outline
Verify the correct Kajabi Course, modules, lessons, locked content, drafts, and publishing state before installing the template.
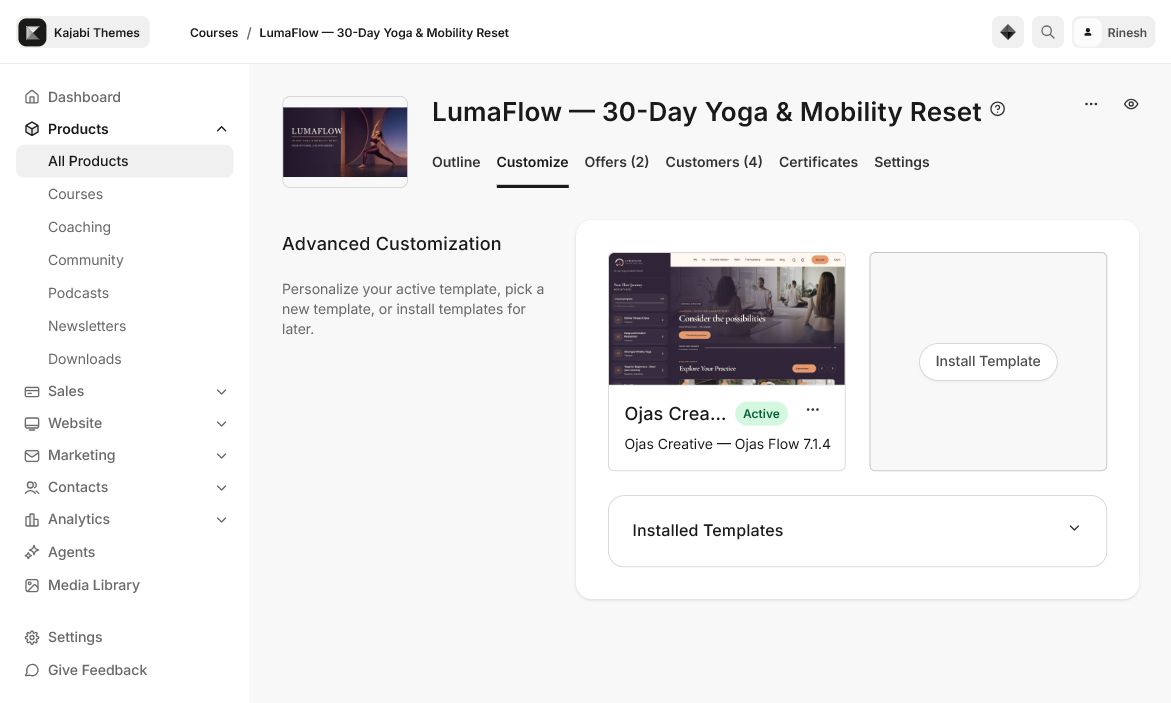
### 2. Install Ojas Flow from Course Customize
Open the selected Course’s Customize tab, choose Install Template, and upload the original Ojas Flow ZIP without extracting or re-zipping it.
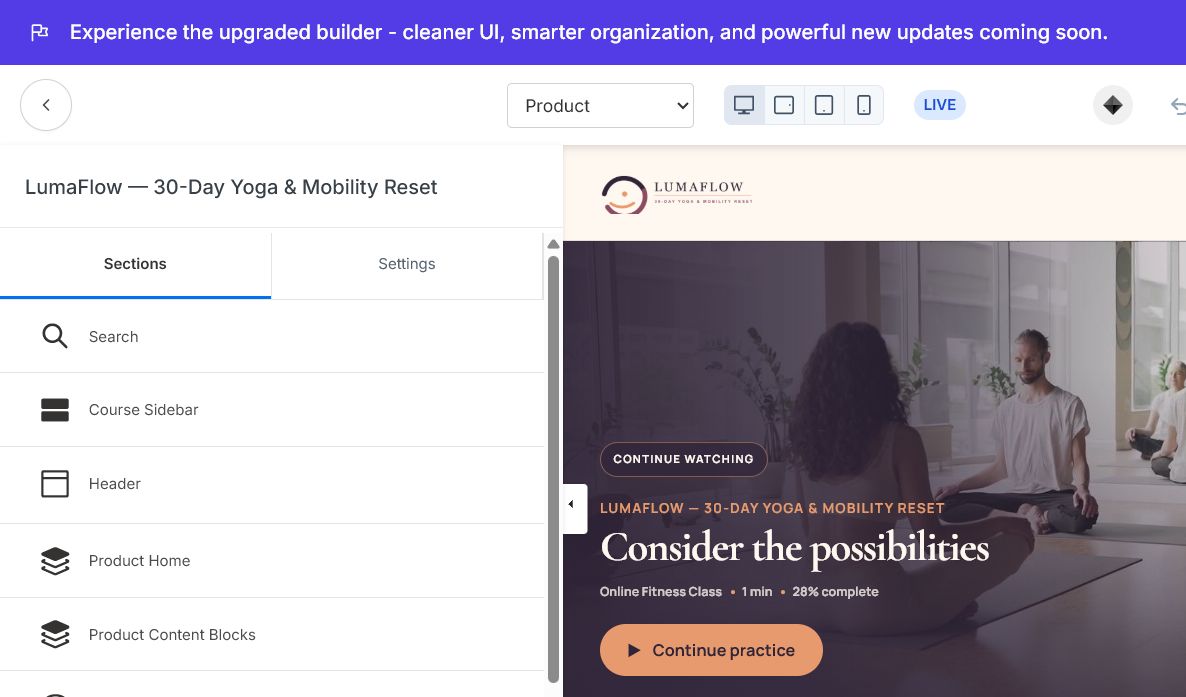
### 3. Review the theme editor
Configure identity, colors, typography, navigation, Product Home, lesson content, member tools, locked states, and mobile behavior before activation.
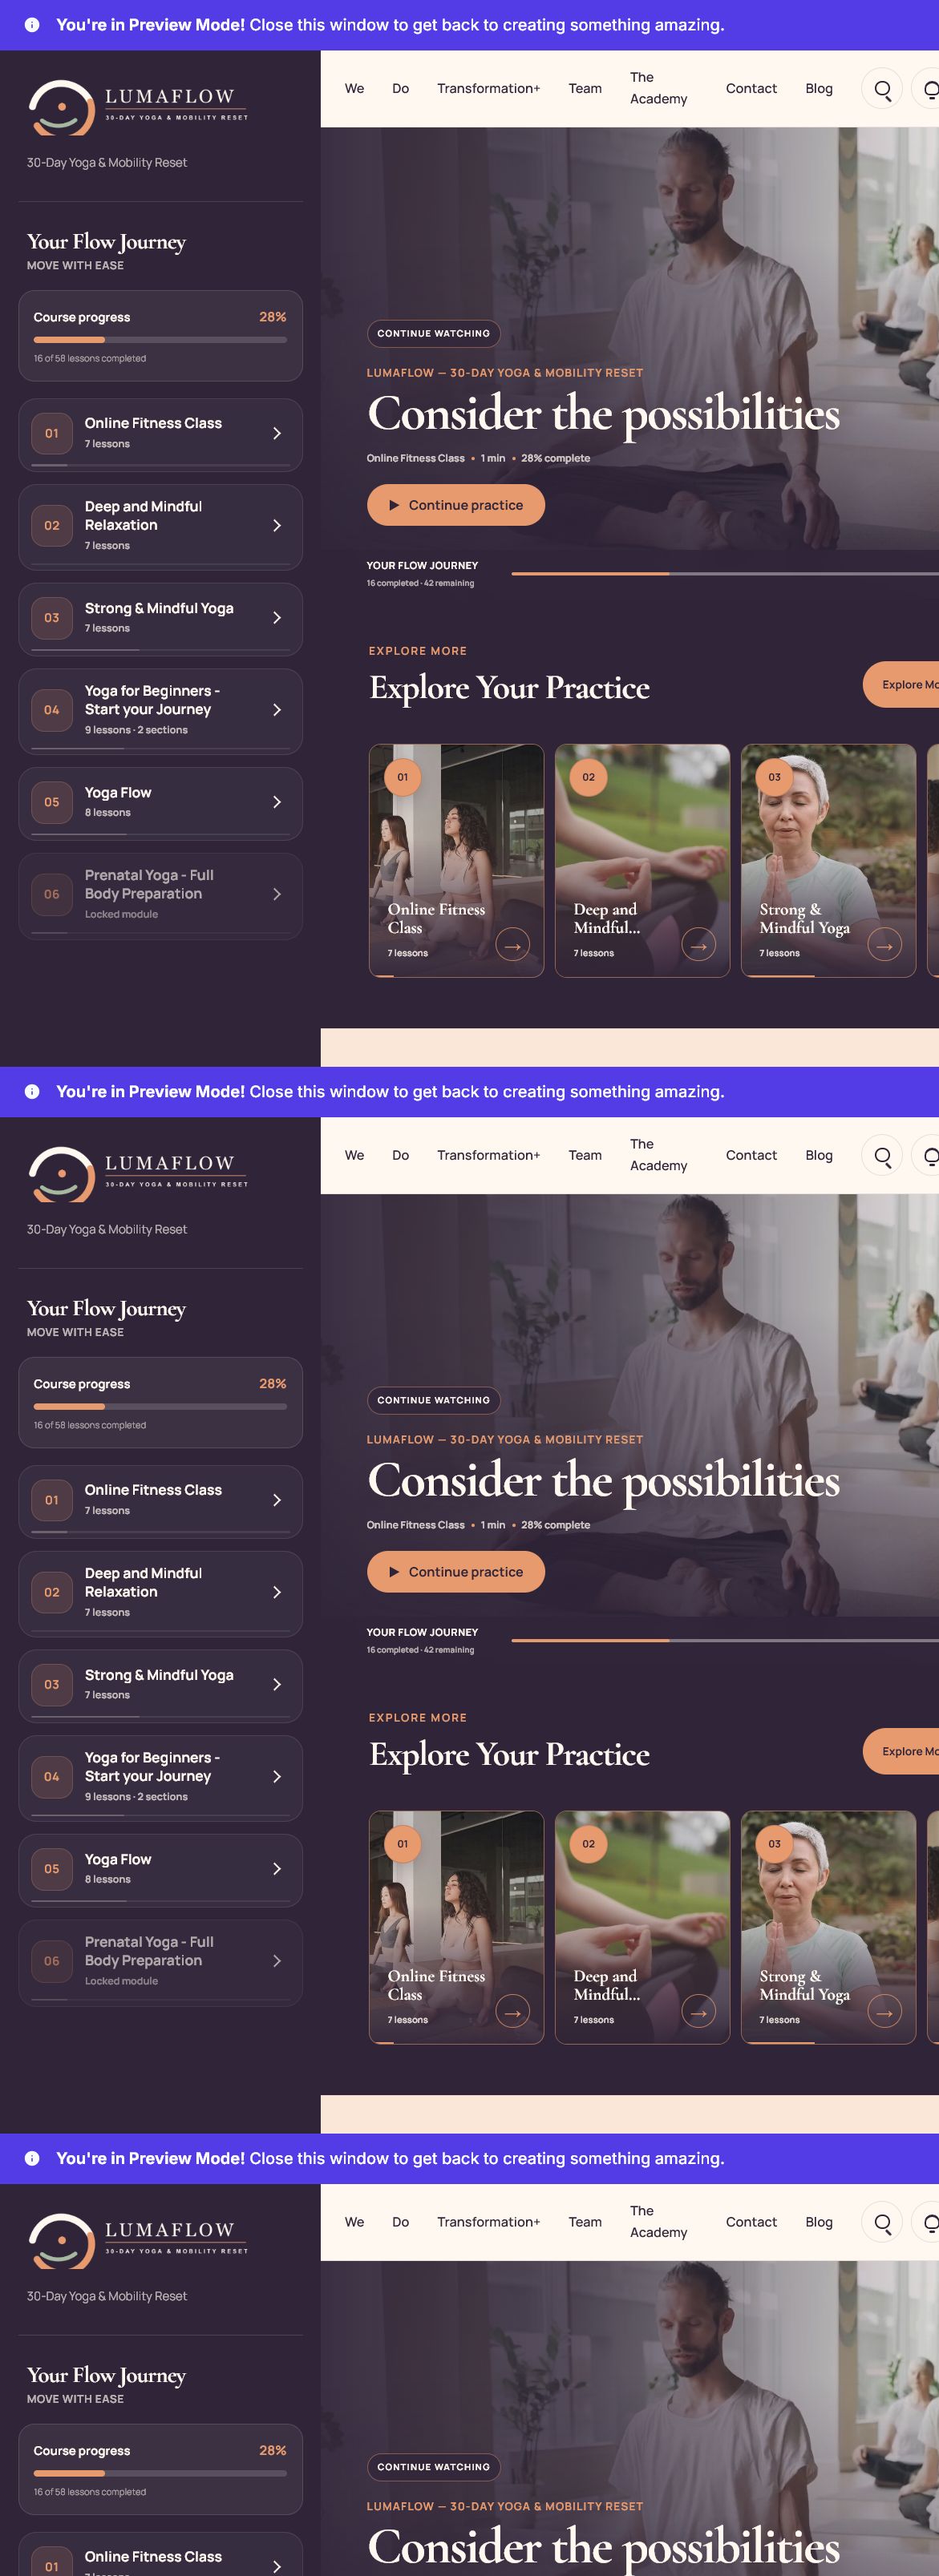
### 4. Test the live member experience
Preview with a real non-admin member on desktop and mobile. Confirm navigation, progress, media, locked content, comments, favorites, Community permissions, and safe-area spacing.
Ojas Creative — Ojas Flow
Premium Kajabi Course Template
Ojas Flow turns a Kajabi Course into a polished movement-focused member experience with a persistent journey sidebar, clear progress, responsive navigation, locked and completed states, community and favorites support, and premium lesson presentation.
Ojas Flow is a Kajabi Course/Product template. Install it from the selected Course’s Customize tab—not from Website Design.
Quick start
- 1Download the original Ojas Flow ZIP and keep it compressed.
- 2Open Products → Courses and select the Course you want to style.
- 3Confirm the Course Outline, then open Customize.
- 4Choose Install Template → Upload Template and upload the untouched ZIP.
- 5Keep the current live template active while you customize and test Ojas Flow.
- 6Preview desktop and mobile with a non-admin member, then activate.
Installing a template does not publish it. Kajabi requires a separate Activate action.
Before you begin
- Confirm you are in the correct Kajabi site and Course.
- Retain the current active Course template for rollback.
- Prepare transparent logos, brand colors, fonts, module thumbnails, lesson media, instructor details, and navigation links.
- Review locked, drip, draft, completed, and published states.
- Replace all demonstration text, media, links, and branding before launch.
1. Confirm the correct Course
Open Products → Courses, select the intended Course, and verify its modules, lessons, locked content, drafts, and publishing state. Each Kajabi Course owns its own Course template. Installing Ojas Flow here will not change your Website template or another Course.
2. Install Ojas Flow
- 1Open the Course’s Customize tab.
- 2Select Install Template, then Upload Template.
- 3Upload the original Ojas Flow ZIP without extracting or re-zipping it.
- 4Wait for Kajabi to process the template.
- 5Confirm the installed metadata reads Ojas Creative — Ojas Flow 7.1.4.
- 6Leave the existing live template active while configuration and QA are completed.
“LumaFlow — 30-Day Yoga & Mobility Reset” is the demonstration Course brand; the reusable marketplace template name is Ojas Creative — Ojas Flow.
3. Customize the experience
Configure the theme in this order:
- 1Identity: upload transparent light and dark logos.
- 2Colors: define accessible page, sidebar, card, text, border, action, and locked-state colors.
- 3Typography: choose readable body and heading fonts and verify long titles on mobile.
- 4Header: review navigation, search, announcements, account actions, and the primary CTA.
- 5Product Home: configure hero content, progress, journey sidebar, category cards, Continue Watching, favorites, and instructor content.
- 6Product Content Blocks: review lesson media, downloads, completion controls, comments, and previous/next navigation.
- 7Community and Favorites: enable only where member permissions and Kajabi data are available.
- 8Mobile Navigation: test the outline drawer, modals, bottom navigation, safe areas, and footer spacing.
4. Prepare Course content
- Keep module and lesson names concise.
- Use consistent 16:9 thumbnails with a clear focal point.
- Add captions, downloads, summaries, and next-step guidance where useful.
- Test empty, locked, drip, completed, draft, and unpublished states.
- When Course comments are disabled, verify the entire comments section disappears.
5. Test before activation
- Desktop: sidebar, header, hero, cards, sliders, footer, and long pages align correctly.
- Mobile: outline drawer, progress, bottom navigation, modals, long titles, and safe-area spacing work.
- Media: video, audio, controls, downloads, thumbnails, and external links work.
- Member tools: search, announcements, comments, favorites, and Community respect Kajabi permissions.
- Access states: locked and drip content remain unavailable to restricted members.
- Real member: a non-admin test member can open the Course from Library, resume a lesson, and record progress.
Do not rely only on editor Preview. Admin sessions may bypass normal member access restrictions.
6. Activate safely
- 1Return to Course → Customize.
- 2Confirm the tested template is Ojas Creative — Ojas Flow.
- 3Keep the previous template installed as a rollback option.
- 4Open the Ojas Flow menu and choose Activate.
- 5Repeat desktop, mobile, and real-member checks after activation.
Activation changes presentation only. Course content, Offers, customers, purchases, progress, payments, and access rules remain controlled by Kajabi.
Updating Ojas Flow
Install the new version beside the live version, retain the customized live template as a backup, compare settings, repeat QA, and activate only after verification.
Troubleshooting
- ZIP will not upload: use the original Course/Product template ZIP from the customer dashboard.
- Installed but not visible: preview it, then use the separate Activate action.
- Logo is missing: re-select it, save, check transparency and contrast, then refresh.
- Cards are empty: publish the relevant modules and lessons and add thumbnails.
- Locked module is incorrect: verify Kajabi access settings and test with a restricted member.
- Community does not load: verify Kajabi Community access and compare with Kajabi’s default Course template.
- Mobile content overlaps: shorten labels and check modal, footer, and bottom-navigation safe areas.
Final launch checklist
- Correct Course selected and original ZIP installed.
- Template name displays as Ojas Creative — Ojas Flow 7.1.4.
- Branding, navigation, Product Home, modules, lessons, and instructor content configured.
- Demonstration copy, media, and links removed.
- Desktop, mobile, locked-state, accessibility, and real-member tests passed.
- Previous template retained for rollback.
Need support?
Include the Ojas Flow version, affected Course page, browser and device, a cropped screenshot, and exact reproduction steps. Never share Kajabi passwords, customer data, payment credentials, API keys, or access tokens.
Continue learning
Ready to build your CineFlow site?
Keep this guide open while you customize, and contact support if you get stuck.